American BOA, Inc. Solves Hydroformer Alignment Issues with OASIS 3D Metrology Services
In this first post of a two post series, we discuss the issues American BOA was having with producing quality corrugated pipe on one of their hydroformers at the Cummings, GA facility.
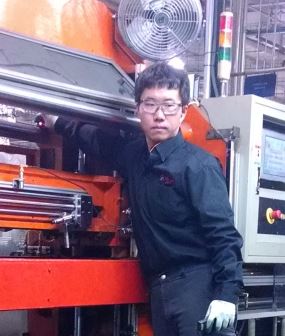
Recently, a customer sent a rave review about the service they received on a project at their facility with a special emphasis on the expertise of the OASIS Metrology Engineer, Li Guan who was on site to complete the job.
Brandon Clifton, Manufacturing Engineer in the Automotive Division of American BOA in Cumming, GA contacted OASIS when one of their hydroforming machines would not produce straight parts. Clifton and his team were unsure what area of the machine was out of alignment, but could clearly see that the parts produced did not meet their straightness quality standards.
The American BOA location in Cumming specializes in manufacturing flexible, corrugated steel pipes for automobiles and other forms of transportation. These particular pipes are used to connect a car’s engine to the exhaust pipe.
The hydroforming process to produce the corrugated steel pipes involves loading raw tube into the hydroforming dies and using hydraulic pressure to expand the tube to the desired shape of the die. A problem arose when the spring shape was not straight coming off of this particular machine. Clifton called in OASIS to inspect this machine and two others that were having possible alignment issues.
The OASIS service center in Charlotte, NC received the initial call. George LeGrand, Southeast Account Manager, met with Clifton at his facility. After providing an initial inspection of the machines, LeGrand suggested having an OASIS metrology engineer complete an in-depth inspection of the first machine using a laser tracker. Due to production volumes in their facility, Clifton needed someone immediately. Li Guan, OASIS Metrology Engineer was first available, and flew to GA from the OASIS Service Center in Montreal, QC.
What I got was so much more than I expected,” Clifton remarked. “When [Li] arrived at my facility, we moved his equipment inside and he immediately began setting up. He visually inspected the machine and we discussed the machine’s function to determine a plan of action. As soon as the laser tracker was warmed up he started inspecting.”
First, Guan visually inspected the machine for two things: how it functions, and where the inspections needed to occur. Additionally, he observed the process the machine goes through to actually make a part. He then determined what the most important components of the machine are, and where the most important inspections needed to be performed. “[Li] inspected every part that we had discussed”,says Clifton, “and then built a model of the machine with the metrology software. The model showed both an out-of-level condition of the machine, as well as misalignment of its cylinders.”
In part two of this series, we will discuss how the 3D Metrology Services provided by OASIS helped to solve the hydroformer misalignment issues at this location.

