The alignment issues went undetected until the contractor attempted the installation of the upper guide bearing and found fitment issues. Because guide bearings require extremely tight tolerances (within thousandths of an inch), this was unacceptable. One of the options to solve this issue, involved dismantling the upper unit and again using the tight wire to restore the centerline.

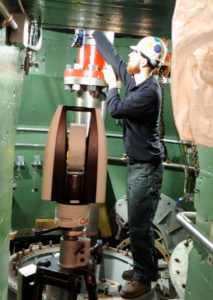
OASIS metrology engineer uses an AT960 laser tracker to gather alignment data at hydro power generating facility.
The other option was to bring in the experts from OASIS Alignment Services to discuss possible ways to reestablish the centerline without having to significantly increase the amount of downtime that would result from having to disassemble the upper unit. The OASIS team arrived onsite and after an initial review, developed a plan to reestablish the centerline and align the upper unit and shaft without having to dismantle the installed components. Using an innovative AT960 laser tracker, the OASIS metrology engineer was able to use the existing center of the upper guide bearing to establish centerline. He then inspected all components, including the upper and lower bridges. The upper unit was then inspected and aligned for all attributes (centerline and shaft plumb).
With more traditional precision measurement tools that require line of sight, reestablishing the centerline without taking apart the installed components would have been impossible. The capabilities of the AT960 laser tracker allowed for transfer of the centerline of the upper guide bearing up on to the operating floor via an access hatch – with no line of sight necessary. Once OASIS completed the alignment, the guide bearing installation was accomplished with zero issues.
